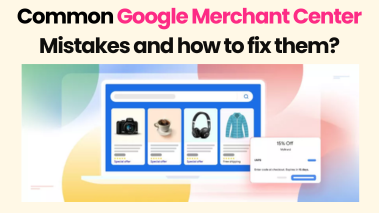
Step-by-Step Guide to Setting Up Google Merchant Center for Your Business
Published on April 25, 2025

If you’re running an e-commerce store or planning to sell products online, getting your items listed on Google Shopping is a smart move. It helps people find your products directly through Google Search, Shopping Tab, and YouTube. One essential step in this process is setting up Google Merchant Center.
Whether you’re managing your store in-house or with help from an online marketing agency in Chennai, this guide will walk you through each step in a simple and clear way—no jargon, no confusion.
What Is Google Merchant Center?
Before we begin, let’s understand what this tool does.
Google Merchant Center is a free platform from Google where you upload and manage your product information. This data is used across Google Shopping and Google Ads to display your products to interested buyers.
To be listed properly, Google needs to know what you’re selling, how much it costs, whether it’s in stock, and where customers can buy it. All that information is handled inside the Merchant Center.
If you’re working with an eCommerce marketing agency in Chennai, they’ll likely start with this setup before running any Google Shopping campaigns.
Step 1: Create a Google Account (If You Don’t Have One)
You’ll need a Google account (Gmail or business email with Google access) to get started. If you already use other Google tools like Analytics, Search Console, or Ads, you can use the same account for Merchant Center.
Click on “Get Started” and sign in using your Google account.
Step 2: Enter Your Business Information
Once you’re in, the platform will ask for basic information:
- Business name (make sure it matches your website name)
- Country where your business is based
- Time zone
This helps Google customize your settings based on your location.
Step 3: Choose Checkout Options
You’ll be asked how customers will buy your products. You can choose from:
- On your website – Customers are redirected to your site.
- On Google (Buy on Google) – Available in select countries.
- At your local store – If you have a physical location.
Most Indian sellers select “On my website” to send traffic directly to their online store.
Step 4: Enter Website and Verify Ownership
Now, enter your website URL. This is where your products are listed.
You need to verify and claim your site to prove it’s yours. Google gives multiple options:
- Add an HTML tag to your website
- Upload an HTML file
- Use Google Tag Manager
- Use Google Analytics
Once verification is complete, claim the site in the Merchant Center interface.
Step 5: Set Up Product Feed
A product feed is a file that contains all your product data: title, description, price, availability, etc.
You can submit your feed in several ways:
- Google Sheets
- Scheduled fetch (pulls from your site at set times)
- Content API (for developers)
- Manual upload (CSV or TXT files)
Make sure to include important fields:
- Product ID
- Product title
- Description
- Image link
- Product URL
- Availability
- Price
- Brand or GTIN
Keep this file updated regularly, especially if your stock or pricing changes often. Keeping your Google Center Merchant account synced helps maintain listing accuracy.
Step 6: Add Tax and Shipping Information
For Indian sellers, tax settings may not be required within the Merchant Center. However, you’ll need to add shipping details such as:
- Delivery charges
- Estimated delivery time
- Supported regions
You can either create general rules (e.g., Free Shipping for all orders over ₹1000) or upload shipping details in your product feed.
Step 7: Enable Free Listings and Ads
Google allows you to show your products on various platforms without paid ads. To enable this:
- Go to the left menu → “Growth”
- Click “Manage programs”
- Activate “Surfaces across Google”
To show products in paid shopping ads, you need to link your Google Ads account to Merchant Center:
- Navigate to “Settings” > “Linked accounts”
- Connect your Google Ads account (or create one)
Step 8: Submit Your Product Feed
Once your feed is ready, go to Products > Feeds > Add Feed and follow the instructions.
Google will review your products and flag any errors. It’s important to regularly check the Diagnostics tab for warnings and disapprovals.
Common issues:
- Price mismatch
- Missing image
- Invalid GTIN
- Inaccurate availability
Fix these issues to keep your listings live.
Step 9: Monitor Performance and Make Updates
Google provides performance reports on:
- Impressions
- Clicks
- Conversions (if connected to Ads)
Use this data to understand which products are performing and where improvements are needed.
You can also run A/B tests by changing product titles, descriptions, or images in your feed to see what works better.
Step 10: Maintain Feed Health
Optimizing your feed is an ongoing task. Here are some practices to follow:
- Use clear, keyword-friendly product titles (e.g., “Men’s Formal Black Leather Shoes – Size 9”)
- Add high-quality images (avoid watermarks and logos)
- Keep prices and stock accurate
- Avoid promotional text in titles or descriptions
- Categorize products properly using Google’s taxonomy
These steps help Google match your product with the right search queries, leading to better visibility.
Helpful Tips for Smooth Setup
- Avoid using placeholder images or dummy data during feed creation.
- If your product catalog is small, start with Google Sheets for easy editing.
- Schedule feed updates at least once daily for fast-changing inventories.
- Use the Content API only if you have developer support or a large catalog.
Common Mistakes to Avoid
- Incorrect or outdated product data
- Not verifying the website
- Poor image quality
- Skipping GTIN or product identifiers
- Ignoring shipping settings
Each of these can result in disapprovals or limited visibility.
Frequently Asked Questions
Q: Is Google Merchant Center free to use?
Yes. It’s completely free to create and manage. You’ll only be charged if you run Shopping Ads through Google Ads.
Q: Can I list products without a website?
Not currently for Indian sellers. A website is required unless using an integrated partner platform.
Q: How long does product approval take?
Usually 1–3 business days. You’ll receive email updates for approvals or disapprovals.
Q: Can I use Merchant Center for service-based businesses?
No. It is strictly for physical or digital products.
Conclusion
Setting up Google Merchant Center is a key step in growing your product visibility through Google. With clear steps, clean product data, and regular updates, your listings can reach more potential buyers.
If you’re unsure how to manage everything—from feed creation to running Google Shopping campaigns—partnering with a reliable digital marketing company in Chennai can make things easier. They can help you avoid common errors, stay compliant with policies, and drive better results for your business.


About Alagar Raja
Alagar Raja is the founder of DIGITIFYU a lead generation agency for coaching businesses and health Industries. He aims to help coach businesses and health Industries. Connect with him on LinkedIn.